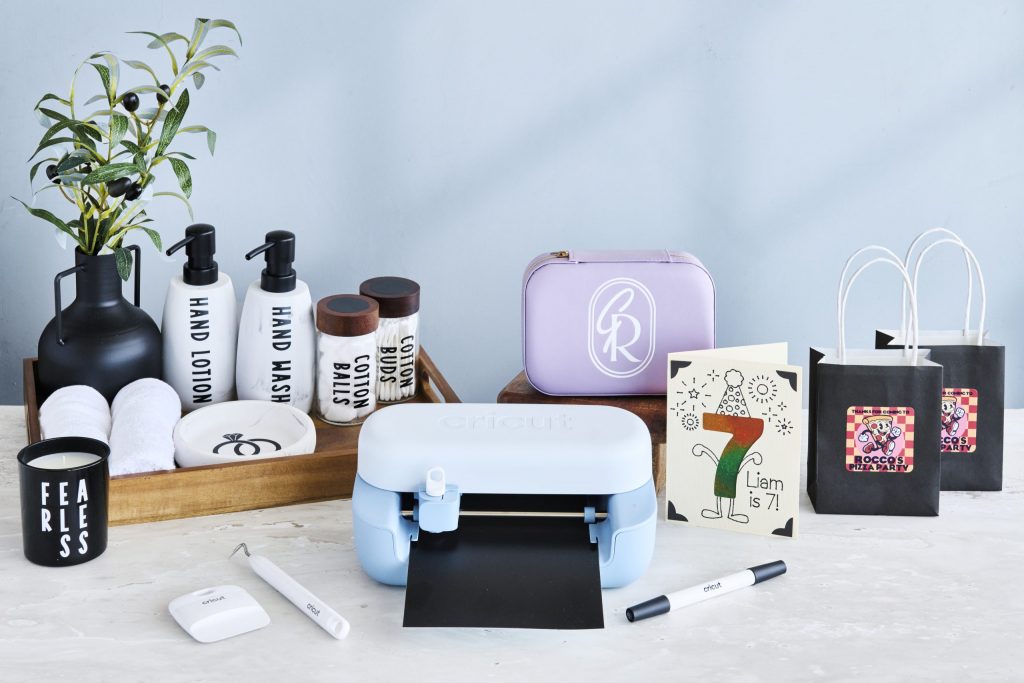
If there was a craft to try, you’ve done it. Knitting? Made the scarf. Crochet? Yes way. Scrap booking? Bought all the decals. If your idea of a good day is making something with your hands, and your favourite presents are often from Michaels, then the Cricut Joy 2 is the perfect thing for you.
How to use the Cricut Joy 2?
To use the machine, you have to use Cricut’s proprietary software, Design Space (available on iOS, Android, Mac, and Windows). Choose between Cricut Access for designs or upload your own SVG, PNG, or JPEG files for free.
Easy projects to try with a Cricut Joy 2
1. Custom Mug or Notebook Decal
A classic vinyl decal is the definitive first Cricut project because it teaches you the fundamental workflow: sizing, cutting, weeding, and transferring.
-
What you need: Smart Vinyl (Permanent), Transfer Tape, a scraper tool, and a smooth blank (like a dollar-store mug, tumbler, or notebook).
-
Why it’s easy: By using Smart Vinyl, you don’t even need to use a cutting mat. You just feed the vinyl directly into your Joy 2.
-
The Workflow: Pick a bold, simple word or icon in Design Space (avoid tiny, cursive text for your first try). Let the machine cut it, “weed” away the background vinyl you don’t want using your hook tool, cover it with Transfer Tape, and press it onto your mug.
2. Full-Colour Custom Stickers
Because the Cricut Joy 2 introduces Print Then Cut technology (which the original Joy didn’t have), making your own sticker sheets is an absolute blast and surprisingly foolproof.
-
What you need: Cricut Printable Sticker Paper (or Printable Vinyl) and a standard home inkjet printer.
-
Why it’s easy: You don’t have to worry about manual alignment.
-
The Workflow: Design your stickers in Cricut Design Space. Send the project to your home inkjet printer first. The printer will print your stickers along with a black “sensor frame” around them. Place that printed sheet onto your Cricut mat and load it into the Joy 2. The machine’s built-in eye reads the sensor marks and cuts out your stickers perfectly.
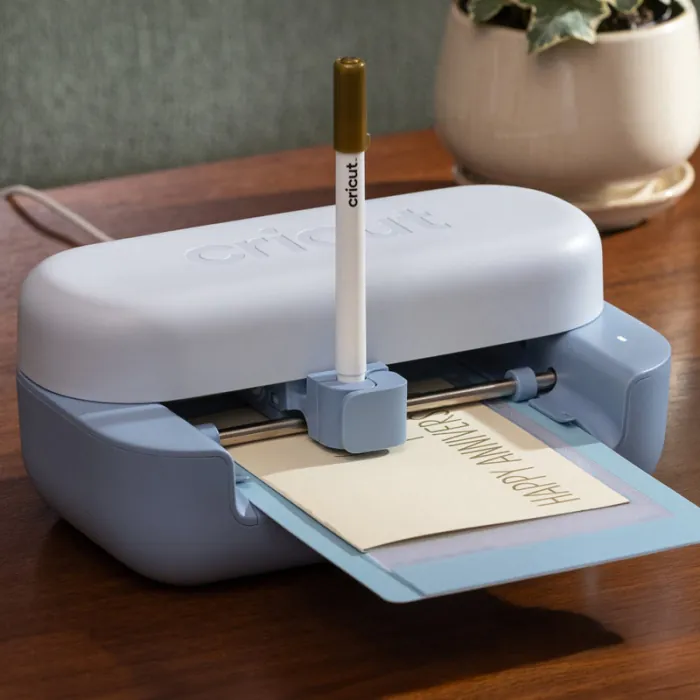
3. A Quick Insert Greeting Card
Making handmade cards is one of the quickest wins you can get with a compact Cricut. They look incredibly professional but take less than five minutes.
-
What you need: A Cricut Joy Card Mat, a pack of Cricut Insert Cards, and a Cricut Joy Pen (optional, if you want it to draw a message).
-
Why it’s easy: The specialized Card Mat features a plastic divider that protects the back of your folded card while the machine precision-cuts a beautiful, intricate design into the front.
-
The Workflow: Select an “Insert Card” project in Design Space. Slide your pre-folded card into the Card Mat sleeve. Let the Joy 2 cut out the design. Once it’s done, slide a contrasting paper insert into the pre-cut corner slots of the card. No glue required!
Which of these projects sounds like the one you want to tackle first?